AI Assistant
ReasLingo is more than just a chatbot; it is your intelligent co-pilot deeply integrated into the ReasLab ecosystem. By leveraging advanced Large Language Models (LLMs) and specialized agents, it provides context-aware assistance, domain-specific insights, and automated workflows to streamline your development and research process. This guide provides a comprehensive overview of the chat interface, model configurations, and collaboration features.
AI Chat Interface
The AI chat panel serves as your primary hub for intelligent collaboration. It maintains a deep connection with your project environment, enabling seamless interaction through natural language to handle tasks ranging from code debugging to mathematical modeling.
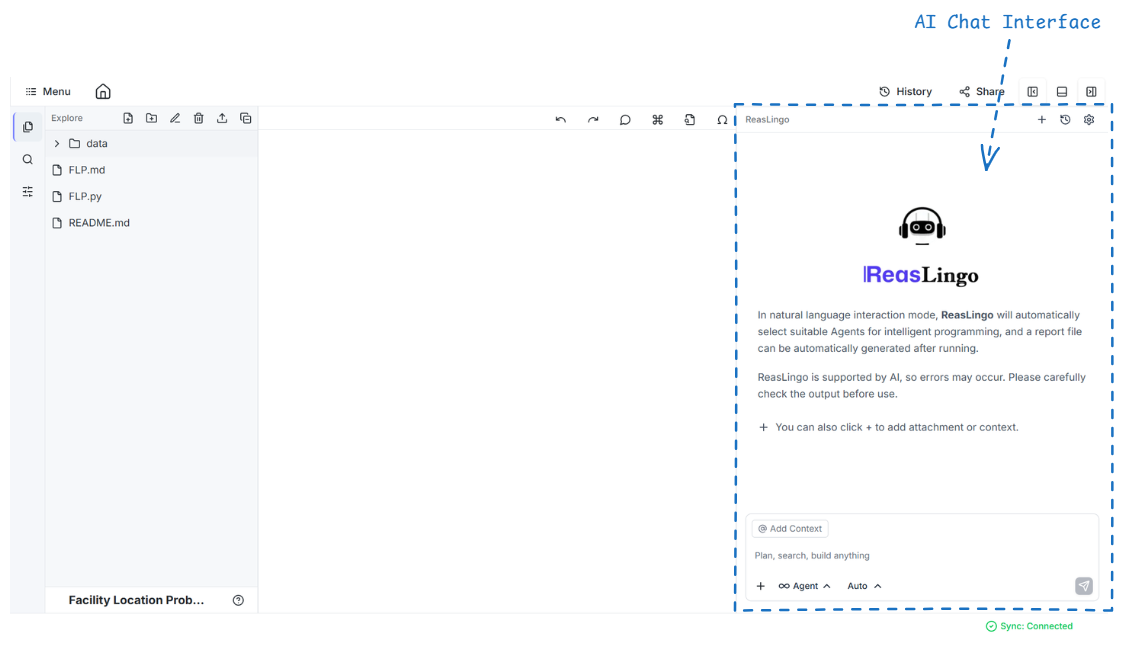
Open & New Chat: ReasLingo is available in the right panel by default. Click the
+icon in the top-right corner to reset the current session and start a fresh conversation.Chat History: Click the History icon in the top toolbar to view and manage your previous chat sessions.
Add Context (Smart Selection):
- Code Selection: Highlight any code in the editor and click the floating "Add to Chat" button to instantly reference it.
- Project Explorer: Right-click any file or folder in the sidebar and select "Add File to Chat" or "Add Directory to Chat".
- Input Bar: Use the
@ Add Contextbutton or the+icon in the input box to browse and attach project resources. - Clipboard Support: Directly paste screenshots, files, or text from your clipboard into the chat interface.
Agent & LLM Selection:
- Agent Menu: Switch between specialized AI agents, such as the Mathematical Modeling Competition Agent or the Thesis Writing & Proofing Agent, to handle domain-specific tasks.
- LLM Selection: The LLM menu (set to Auto by default) allows the system to choose the best underlying model automatically, or you can manually switch between different Large Language Models.
Send Message: Type your instructions in the input box and press Enter (or click the Send icon) to begin.
LLM Configuration
ReasLingo provides the flexibility to expand your AI capabilities beyond the default deepseek-chat model. You can integrate various third-party providers to customize your own LLM suite, ensuring you always have access to the most suitable model for your specific needs.

Access Settings: Click the Settings (gear) icon in the top-right corner of the chat panel to open the Models configuration list.
Manage Providers: View and manage multiple AI providers such as SiliconFlow, AiHubMix, DeepSeek, OpenRouter, and DashScope.
Add a New Provider:
- Click the
+ Add Providerbutton at the bottom of the list. - Enter the Provider Name (e.g., OpenAI, Anthropic), Base URL, and your API Key.
- Click Save to add the provider to your management list.
- Click the
Add Custom LLMs:
- Once a provider is configured, click the
+ Add Modelbutton. - Enter a Label (a display name for your reference, e.g.,
deepseek-custom) and the specific Model ID (e.g.,deepseek-chat). - Click Save to add the LLM to your selection list.
- Once a provider is configured, click the
Switching LLMs: After configuration, your custom options will appear in the LLM Selection menu at the bottom of the chat interface. You can then switch from Auto to your preferred model.
AI Collaboration & Sharing
Collaboration is at the heart of ReasLab. You can share your AI interactions with team members to synchronize insights and accelerate project progress through two efficient sharing methods.
Method 1. Send Copy to Collaborators
Use this method to share specific messages or entire sessions from your chat history directly to project members.
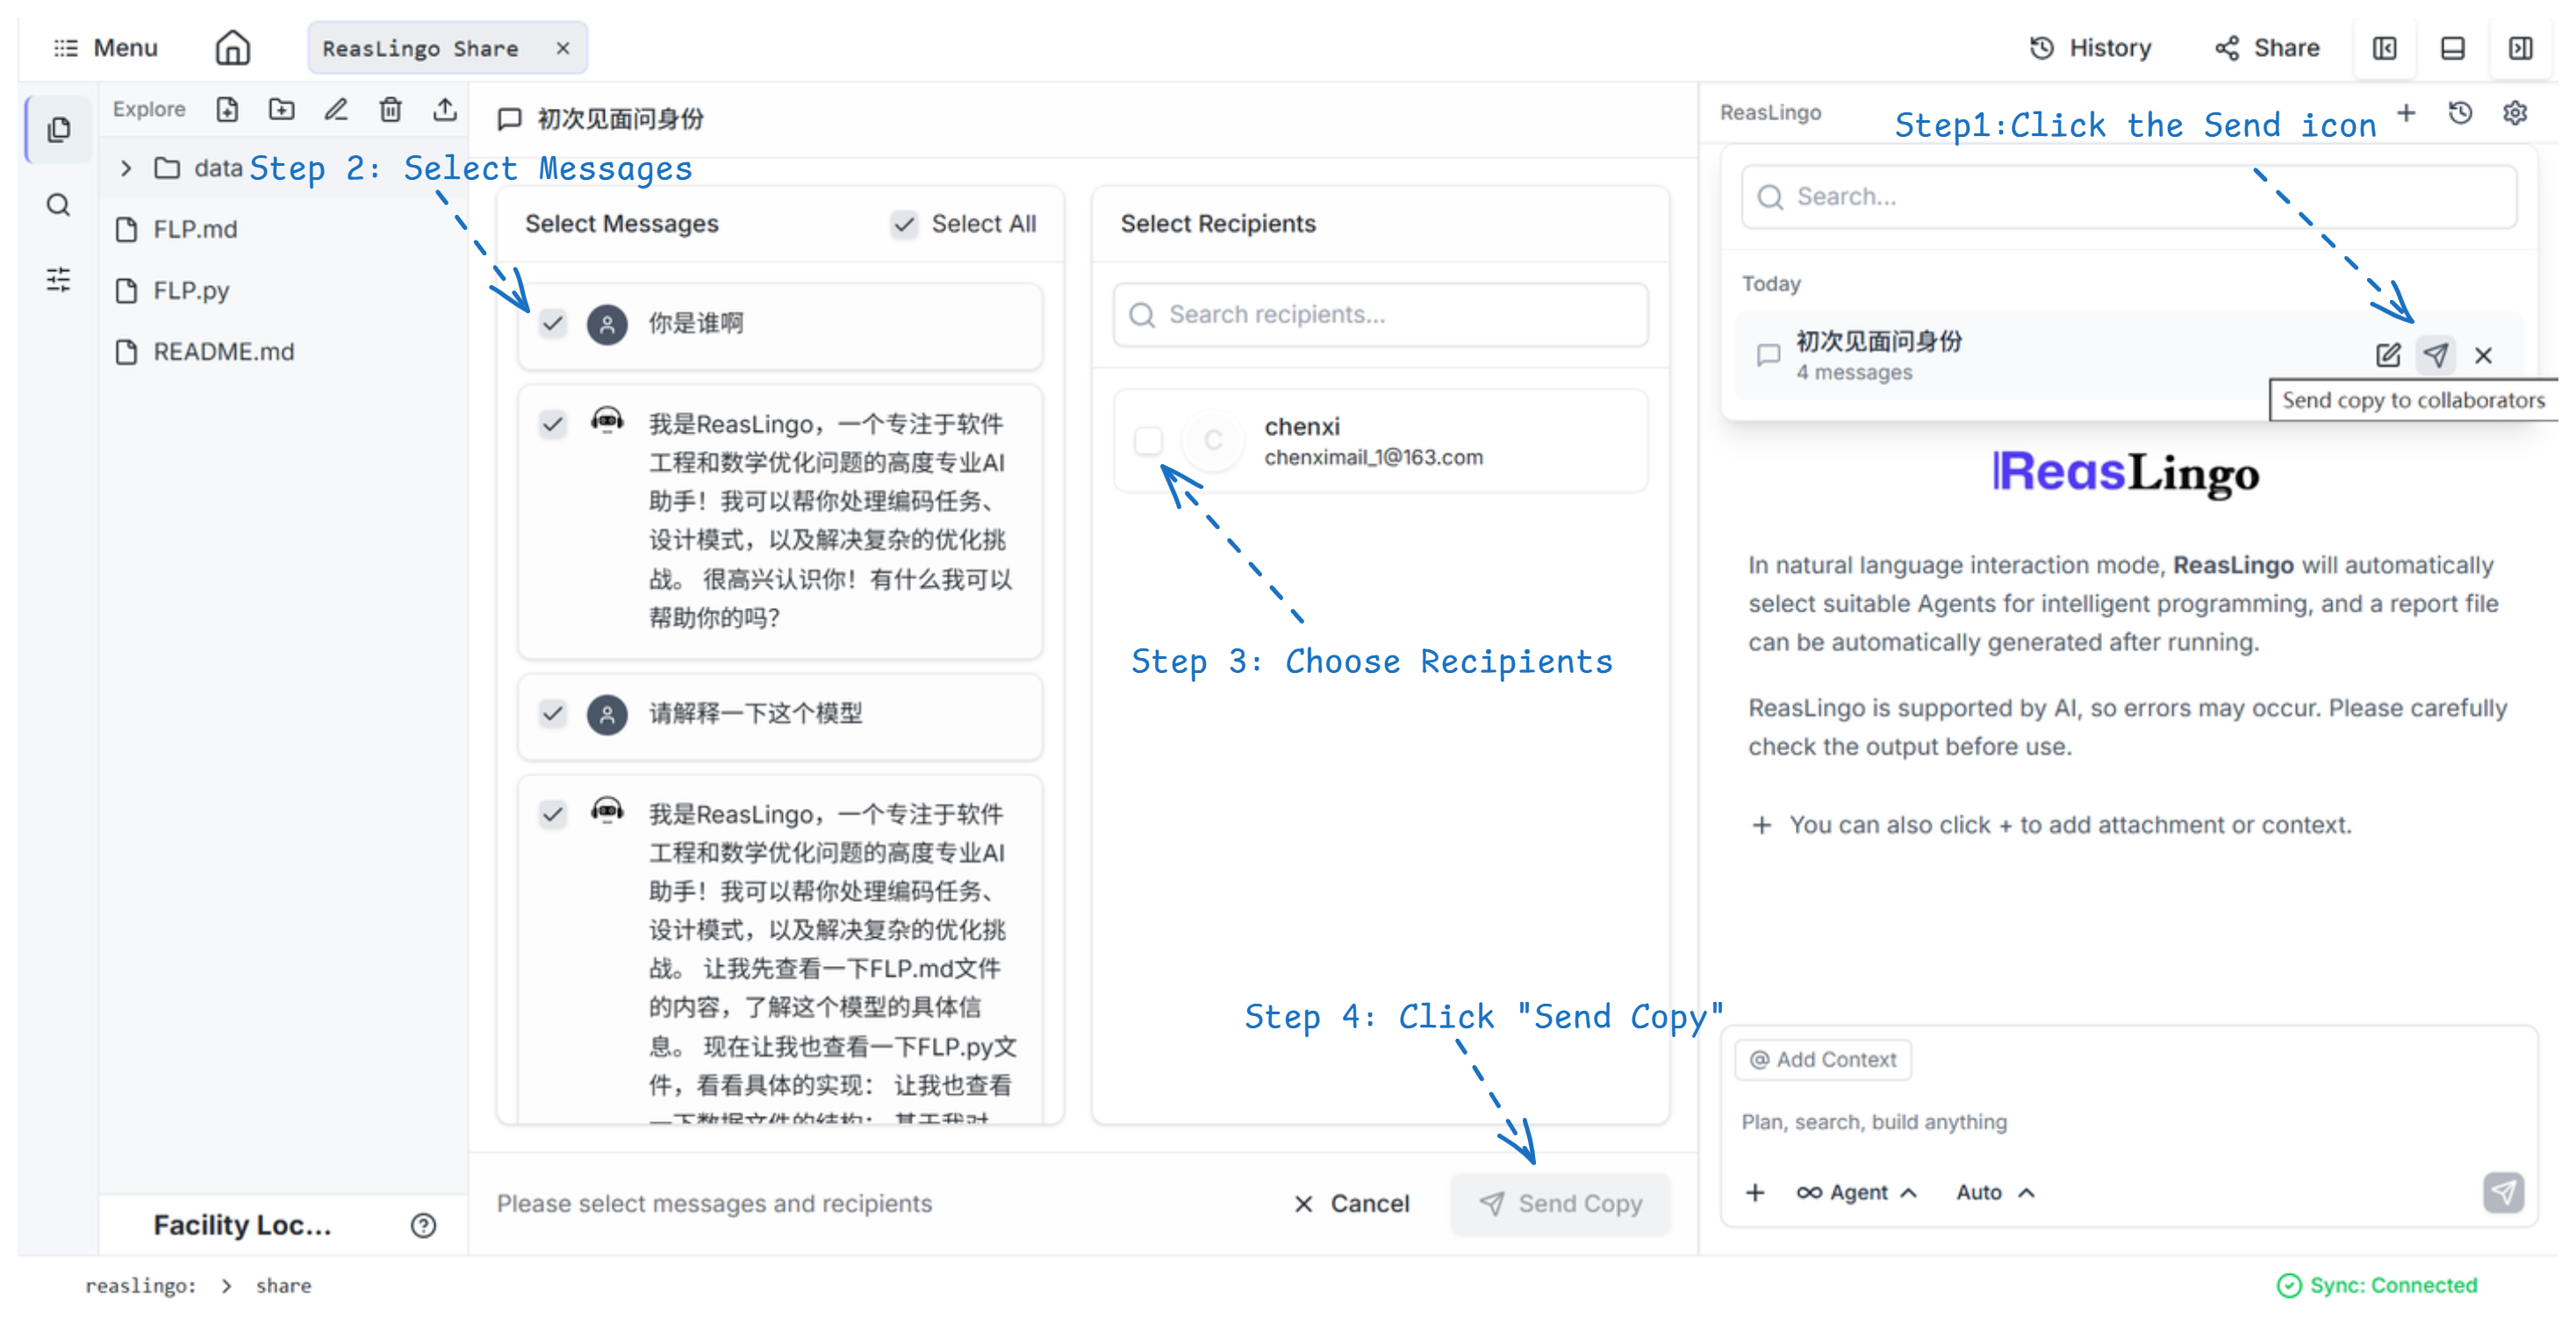
- Trigger Sharing: Open the History list and click the "Send copy to collaborators" (paper plane icon) next to a specific chat session.
- Select Messages: In the sharing interface, you can choose to share the entire conversation or manually select specific messages (Q&A pairs).
- Choose Recipients: Select one or multiple collaborators from your project list to receive the copy.
- Confirm Send: Click the "Send Copy" button to finalize the process.
Method 2: Share via Project Link (with AI Context)
Include your AI chat history as a persistent part of the overall project sharing link, allowing collaborators to access the full context of your AI consultations.

Open Project Share: Click the "Share" button in the top-right corner of the main interface to open the Sharing Project dialog.
Include AI Context: Check the "Include AI Context" box to include chat history in your shared project link.
Customize Sessions:
- By default, all sessions are included.
- To share specific chats only, click "Customize" to open the selection dialog, where you can pick individual conversations.
Set Permissions: Choose whether your collaborators can Read, Edit, or Manage the project before copying the link or sending invites.