Projects & Imports
This guide covers creating a fresh workspace, importing existing repositories, and joining shared projects via links. ReasLab supports various specialized project templates tailored to different use cases.
After logging in, you land on the Projects page where you can view and manage all your projects.
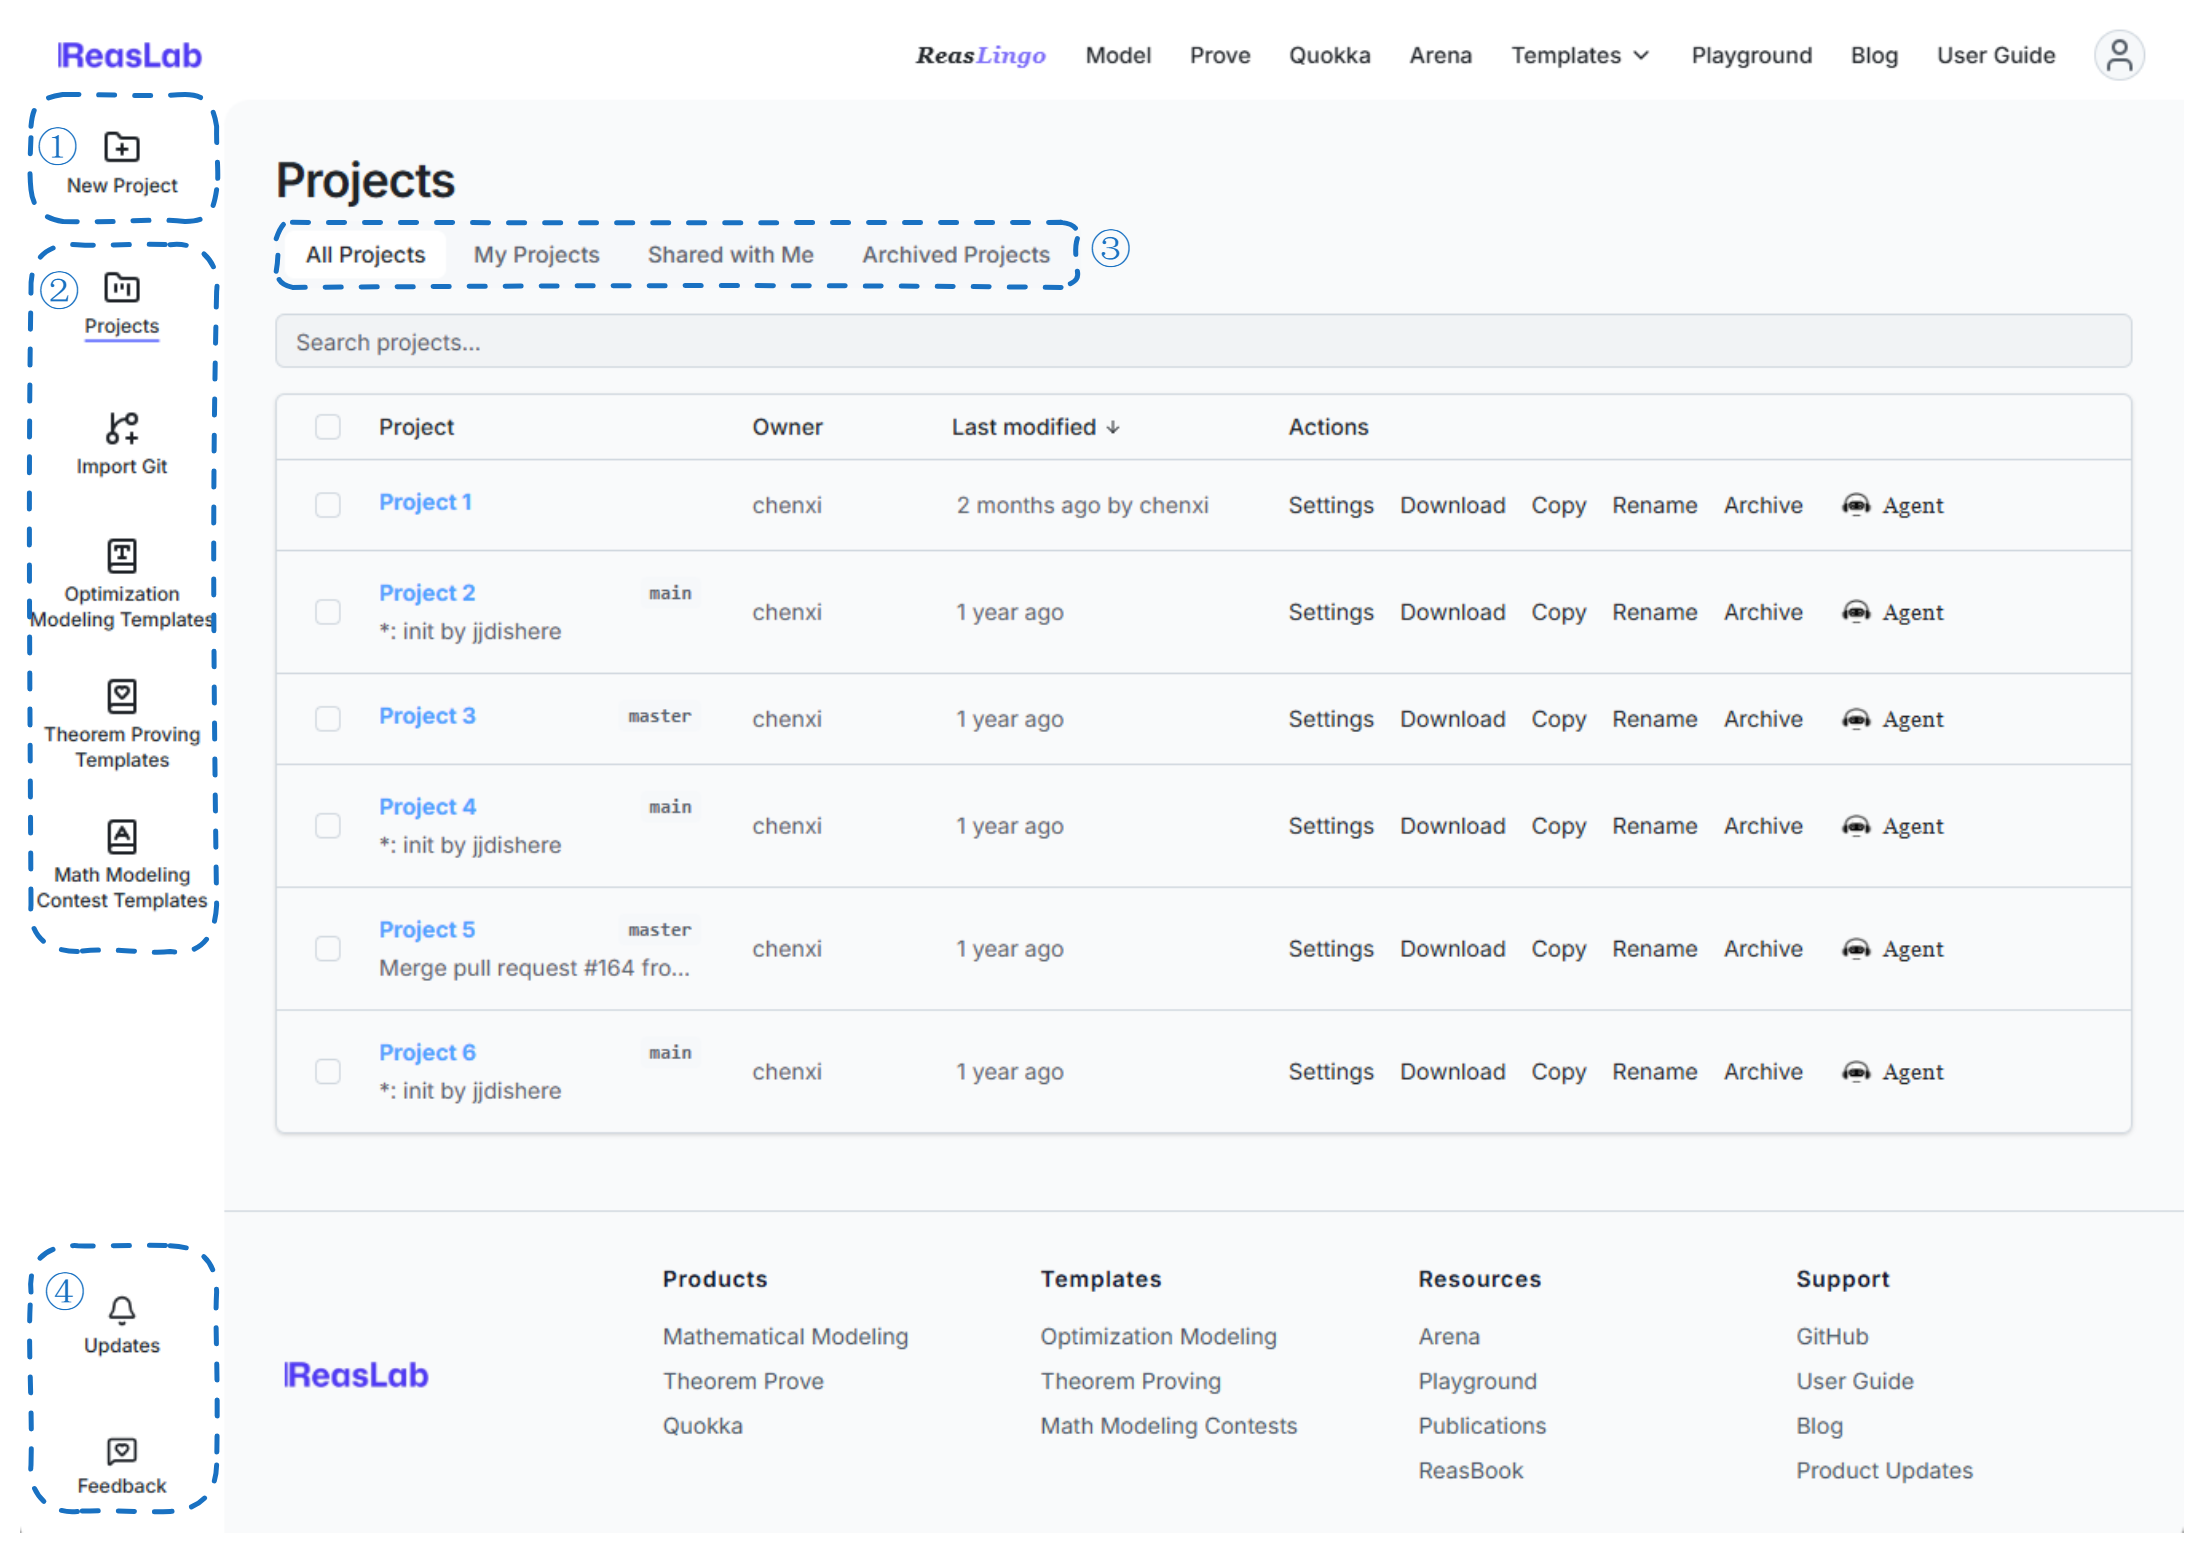
- ① Create Project: Start a new project from the sidebar — New Project, Import Git, or a template library.
- ② Project Management tab: Manage all your projects — filter, archive, or leave shared projects.
- ③ Filter: In the Project Management tab, you can switch between All Projects, Owned by You, Shared with You, and Archived. Projects you own can be archived, and projects shared with you can be left.
- ④ Updates / Feedback: Updates shows product announcements. Feedback lets you report issues — it is filed as a GitHub issue automatically.
Create a new project
There are multiple ways to start your journey in ReasLab, depending on whether you want a clean slate or a pre-configured environment.
1. Creating a Blank Project (New Project)
Suitable for general scientific writing or custom project structures. Usually, you start by clicking New Project in the Dashboard sidebar. The New Project page provides two tabs: Blank Project for starting from scratch, and Import from ZIP for uploading an existing project archive.
Blank Project
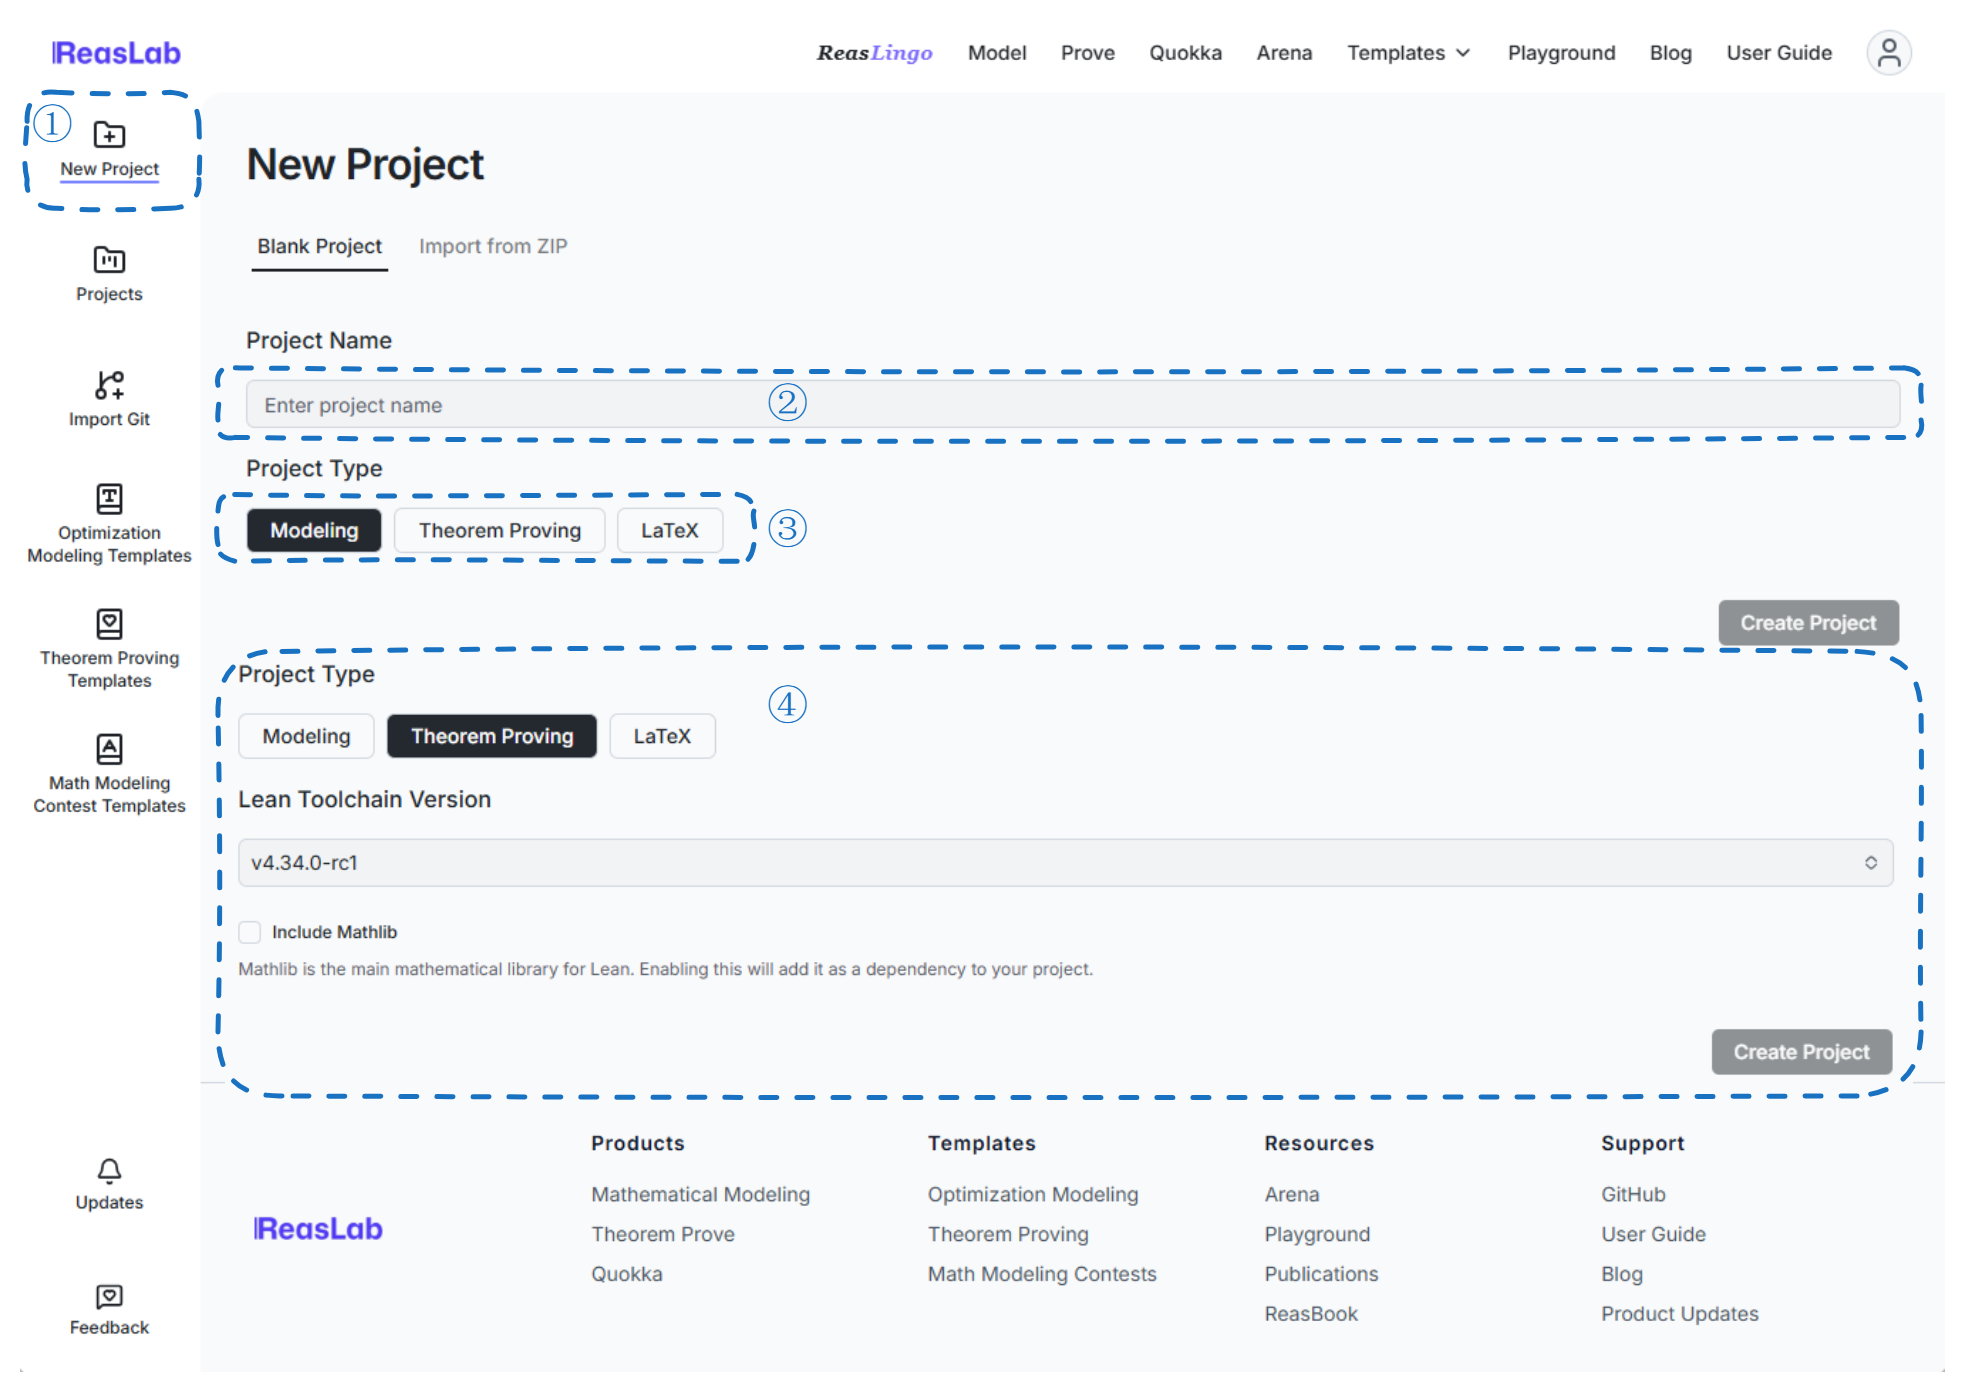
- ① Click this to switch to the New Project tab.
- ② Enter your Project Name here.
- ③④ Configure the project in this area:
- ③ Choose the Project Type: Modeling, Theorem Proving, or LaTeX.
- ④ If you select Theorem Proving, set the Lean Toolchain Version and optionally Include Mathlib.
- ⑤ When everything is ready, click this button to create the project.
Import from ZIP
Upload an existing project as a .zip archive to create a new project directly from it. There is no need to enter a name or select a type: the project name is derived from the uploaded file name, and the project type (Theorem Proving, LaTeX, or Modeling) is automatically detected from the archive contents. 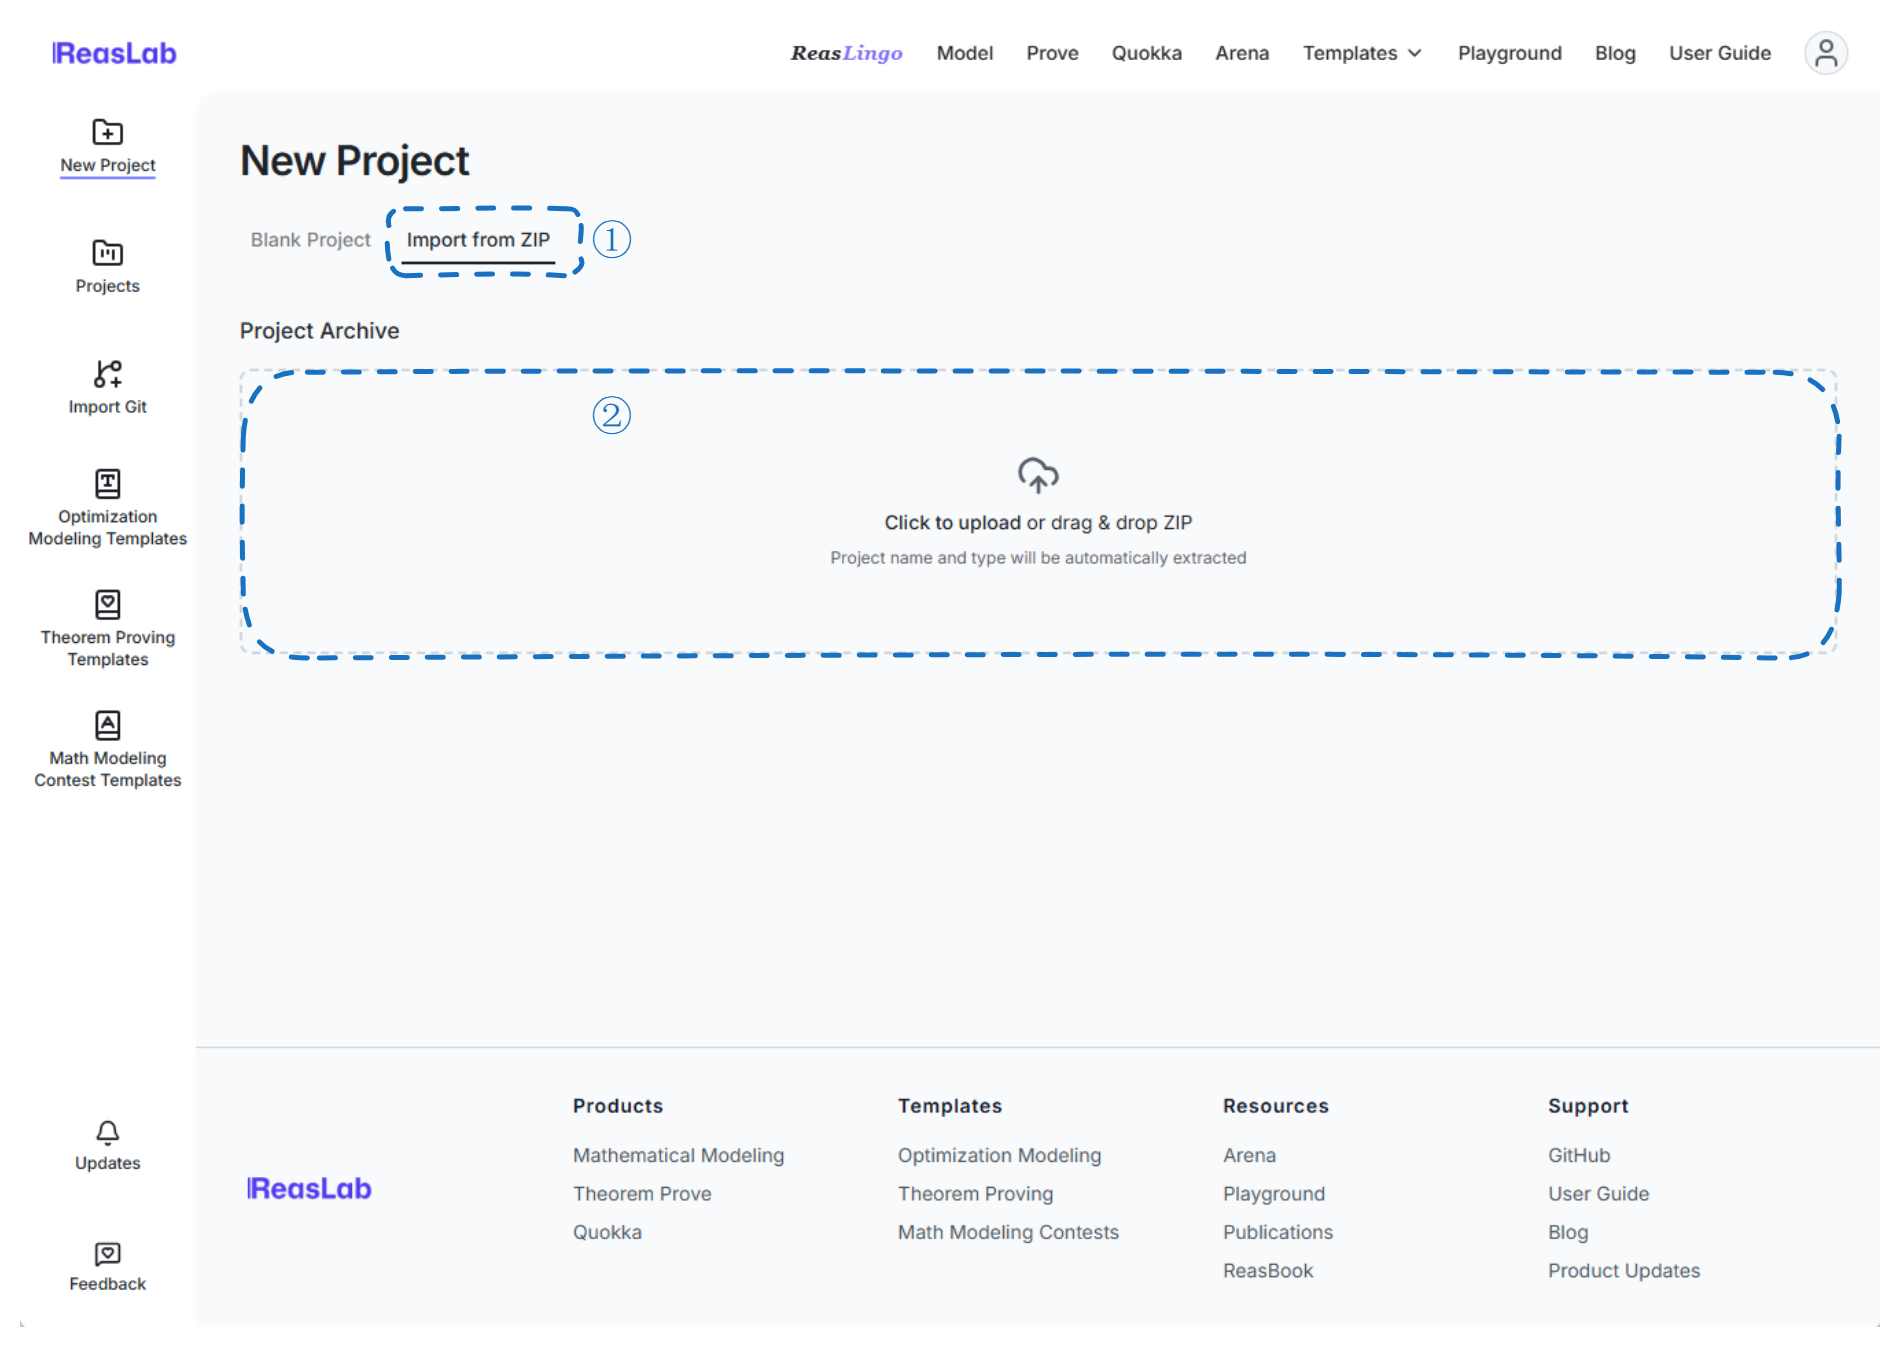
- ① Switch to the Import from ZIP tab.
- ② Click to upload, or drag & drop, a
.ziparchive (up to 95 MB). The upload starts immediately, and once extraction finishes you are redirected to the new project.
If a project with the same name already exists, a short random suffix is appended automatically to keep names unique.
2. Creating from a Math Modeling Template
Designed for competition participants. These templates come with the problem background and report structure. 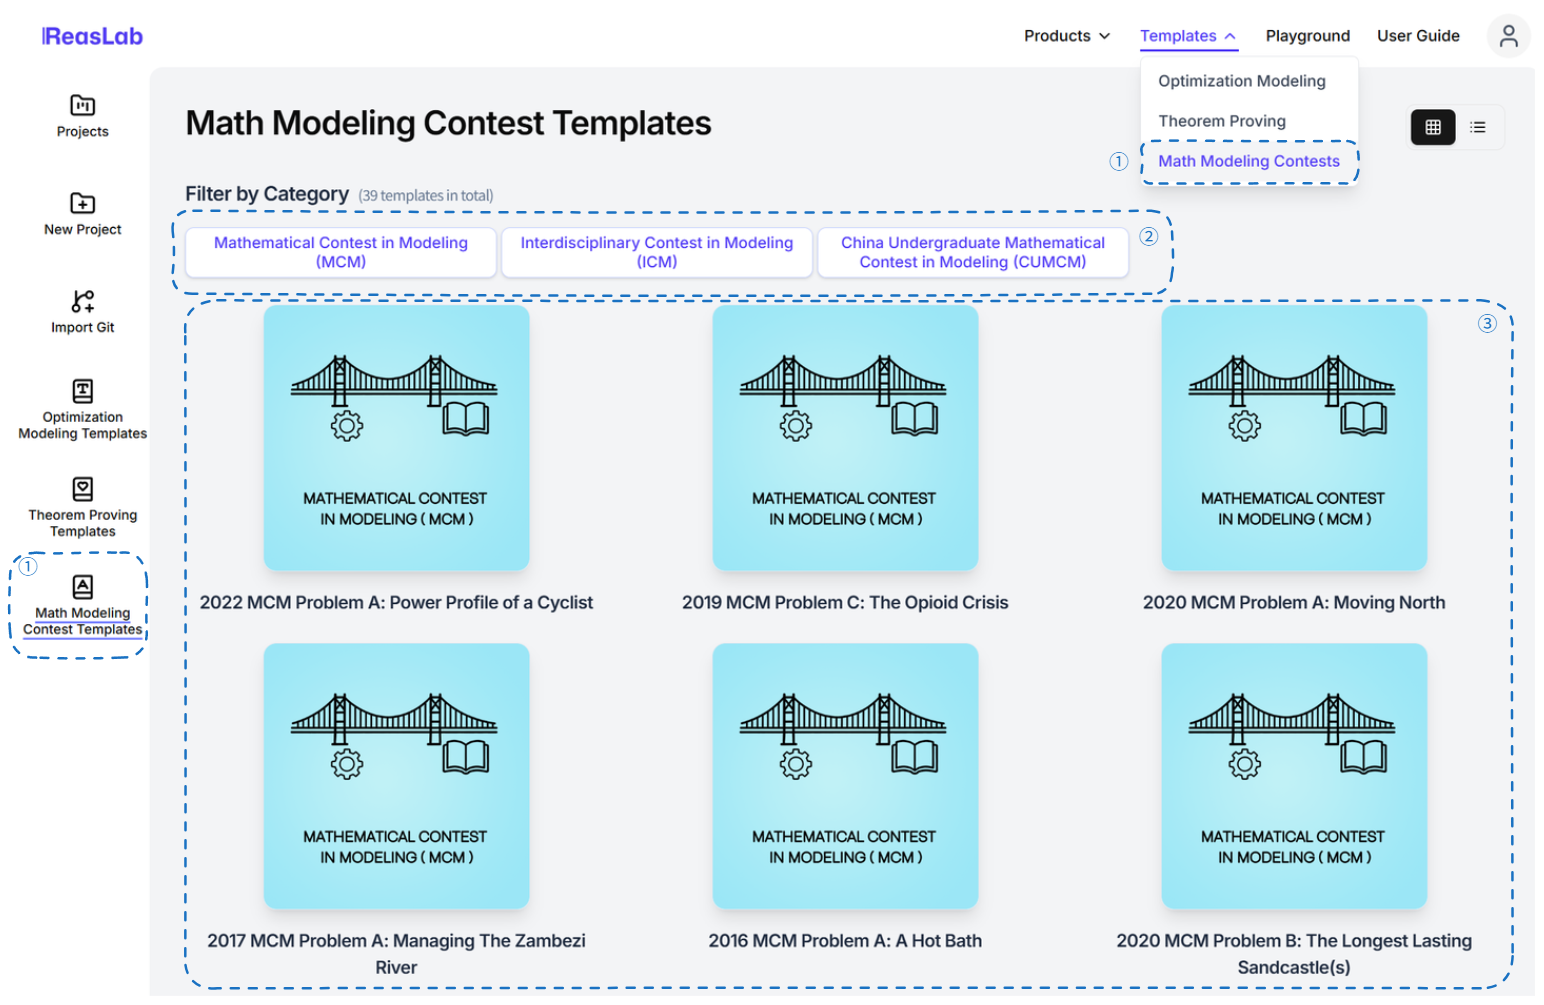
- ① Buttons to navigate to the Math Modeling template area — includes top and left navigation buttons.
- ② Filter suitable templates by categories.
- ③ The available templates appear here. Open one to preview its content, then click Use Template to create the corresponding project.
3. Creating from an Optimization Modeling Template
Quickly start optimization problems with mathematical models and solver configuration included. The system provides 9 major categories and 173 subcategories of optimization templates. You can use the tree view to locate a suitable template, then click Use Template to create your own project. 
- ① Buttons to navigate to the Optimization Modeling template area — includes top and left navigation buttons.
- ② Filter suitable templates by categories.
- ③ The available templates appear here. Open one to preview its content, then click Use Template to create the corresponding project.
4. Creating from a Lean (Theorem Proving) Template
Start a formal verification project with a preconfigured Lean 4 environment. 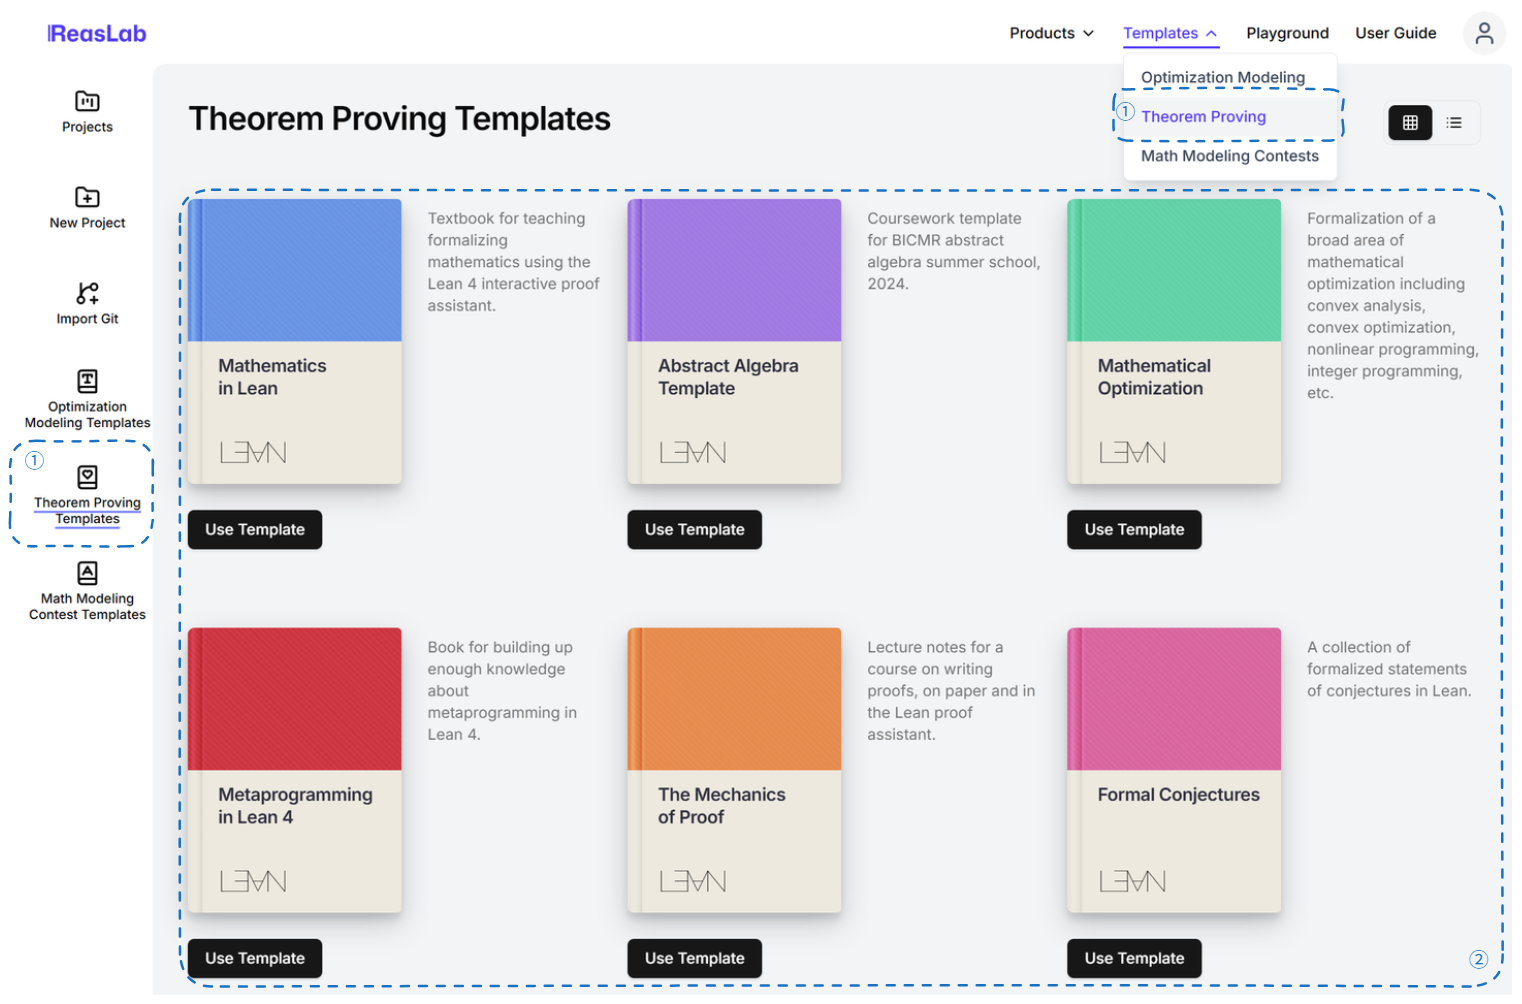
- ① Navigate to the Lean template library — one button on the left and one at the top.
- ② Select a template and click Use Template to create a project.
Import from Git
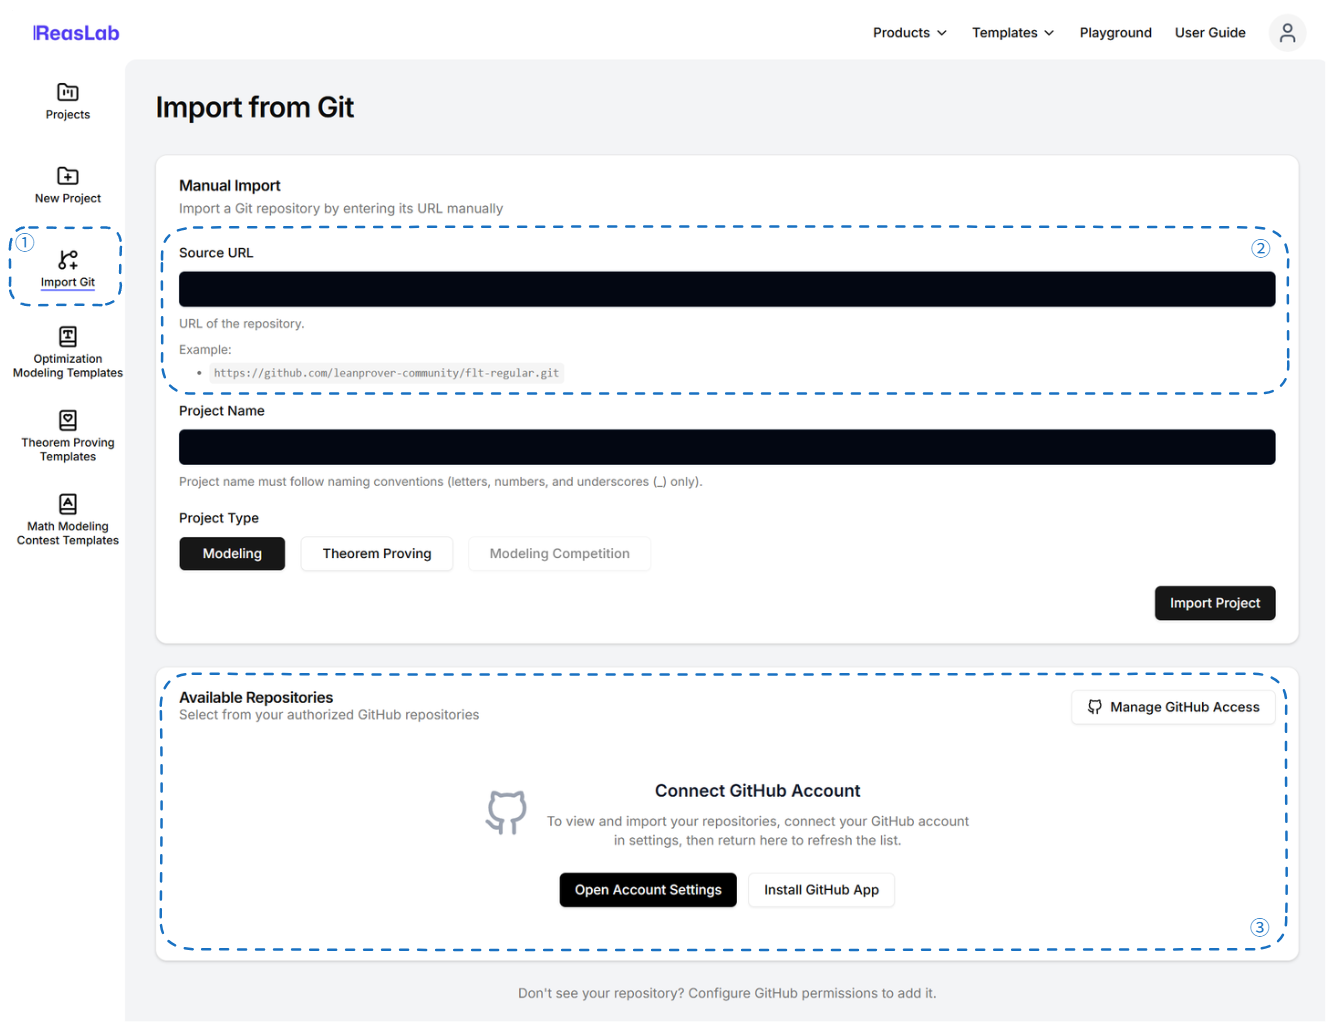
There are several ways to bring an existing repository into the formal workflow:
- ① Click the Git tab to switch to the Git import interface.
- ② Enter the repository information by pasting a Git URL and configuring the project to import it.
- ③ Link your GitHub account to browse projects directly from your account without manually pasting the URL. The system imports the repository based on its default branch.
For more advanced Git operations (branch management, commit history, conflict resolution), see the Git Integration guide.
Join via Share Link
- If you receive a high-permission share link from another member, open it in the browser after signing in. You can then join the project with the granted permissions, such as view, edit, or manage, and collaborate with others in the same workspace.
For details, see the Collaboration guide.